Cattails don’t just “grow in.” They build a wall. Once stems thicken, access disappears, visibility drops, and every season gets harder.
The win condition is simple: cut, collect, and contain — then keep the shoreline open with a follow-up cadence that prevents the wall from rebuilding.
This playbook covers the field steps that keep cattail projects clean: staging, sequencing, containment, and what to do with the biomass once it hits shore.
Quick answers (what most owners want to know first)
- Yes, you can open shoreline access fast — but only if biomass handling is planned.
- The mess comes from drift. If cut material floats away, you’ve created a second job.
- The first cut is the reset. The follow-up is what keeps cattails from reclaiming the edge.
- Shallow shelves are the regrowth engine. If shelves are expanding, consider pairing with depth work later.
Cattails vs. the shoreline: what’s really happening
Cattails expand when the shoreline gives them a shelf: shallow water + soft sediment + nutrients. Over time, that shelf grows outward and the stems get denser. That affects the whole waterbody:
- shoreline access disappears,
- circulation slows in coves,
- debris pins and decomposes,
- and the edge becomes a nutrient factory.
If your goal includes bank stability and long-term erosion control, pair the cut plan with shoreline restoration.
Step 1: treat the shoreline like an operations zone (not “where weeds are”)
Before we cut, we set the shoreline up like a production area.
The staging rules
- Build a staging pad that stays firm when wet (or choose a firm zone).
- Create a clean in/out route so trucks and support don’t reverse through soft ground.
- Decide where biomass goes immediately, not “later.”
- Keep the bank edge open so the machine can keep feeding the shoreline.
If your site has a single narrow access point, tell us early — it changes how we stage piles and load trucks.
Step 2: choose the right timing (so you cut once, not twice)
Season matters. The best window depends on your goals: access, aesthetics, seed reduction, or habitat considerations.
| Goal | Typical best window | Why |
|---|---|---|
| Open access / visibility | Late spring through summer | Maximum usable shoreline improvement immediately |
| Reduce seed spread | Before seed heads mature | Limits dispersal to new shoreline zones |
| Prep for shoreline work | Before restoration mobilization | Keeps bank work visible and accessible |
| “Maintenance pass” | Late season / after first reset | Smaller volume, cleaner shoreline, faster work |
Local regulations and habitat constraints can affect timing. If you’re unsure, we can plan a scope that respects your site’s constraints while still achieving access and containment.
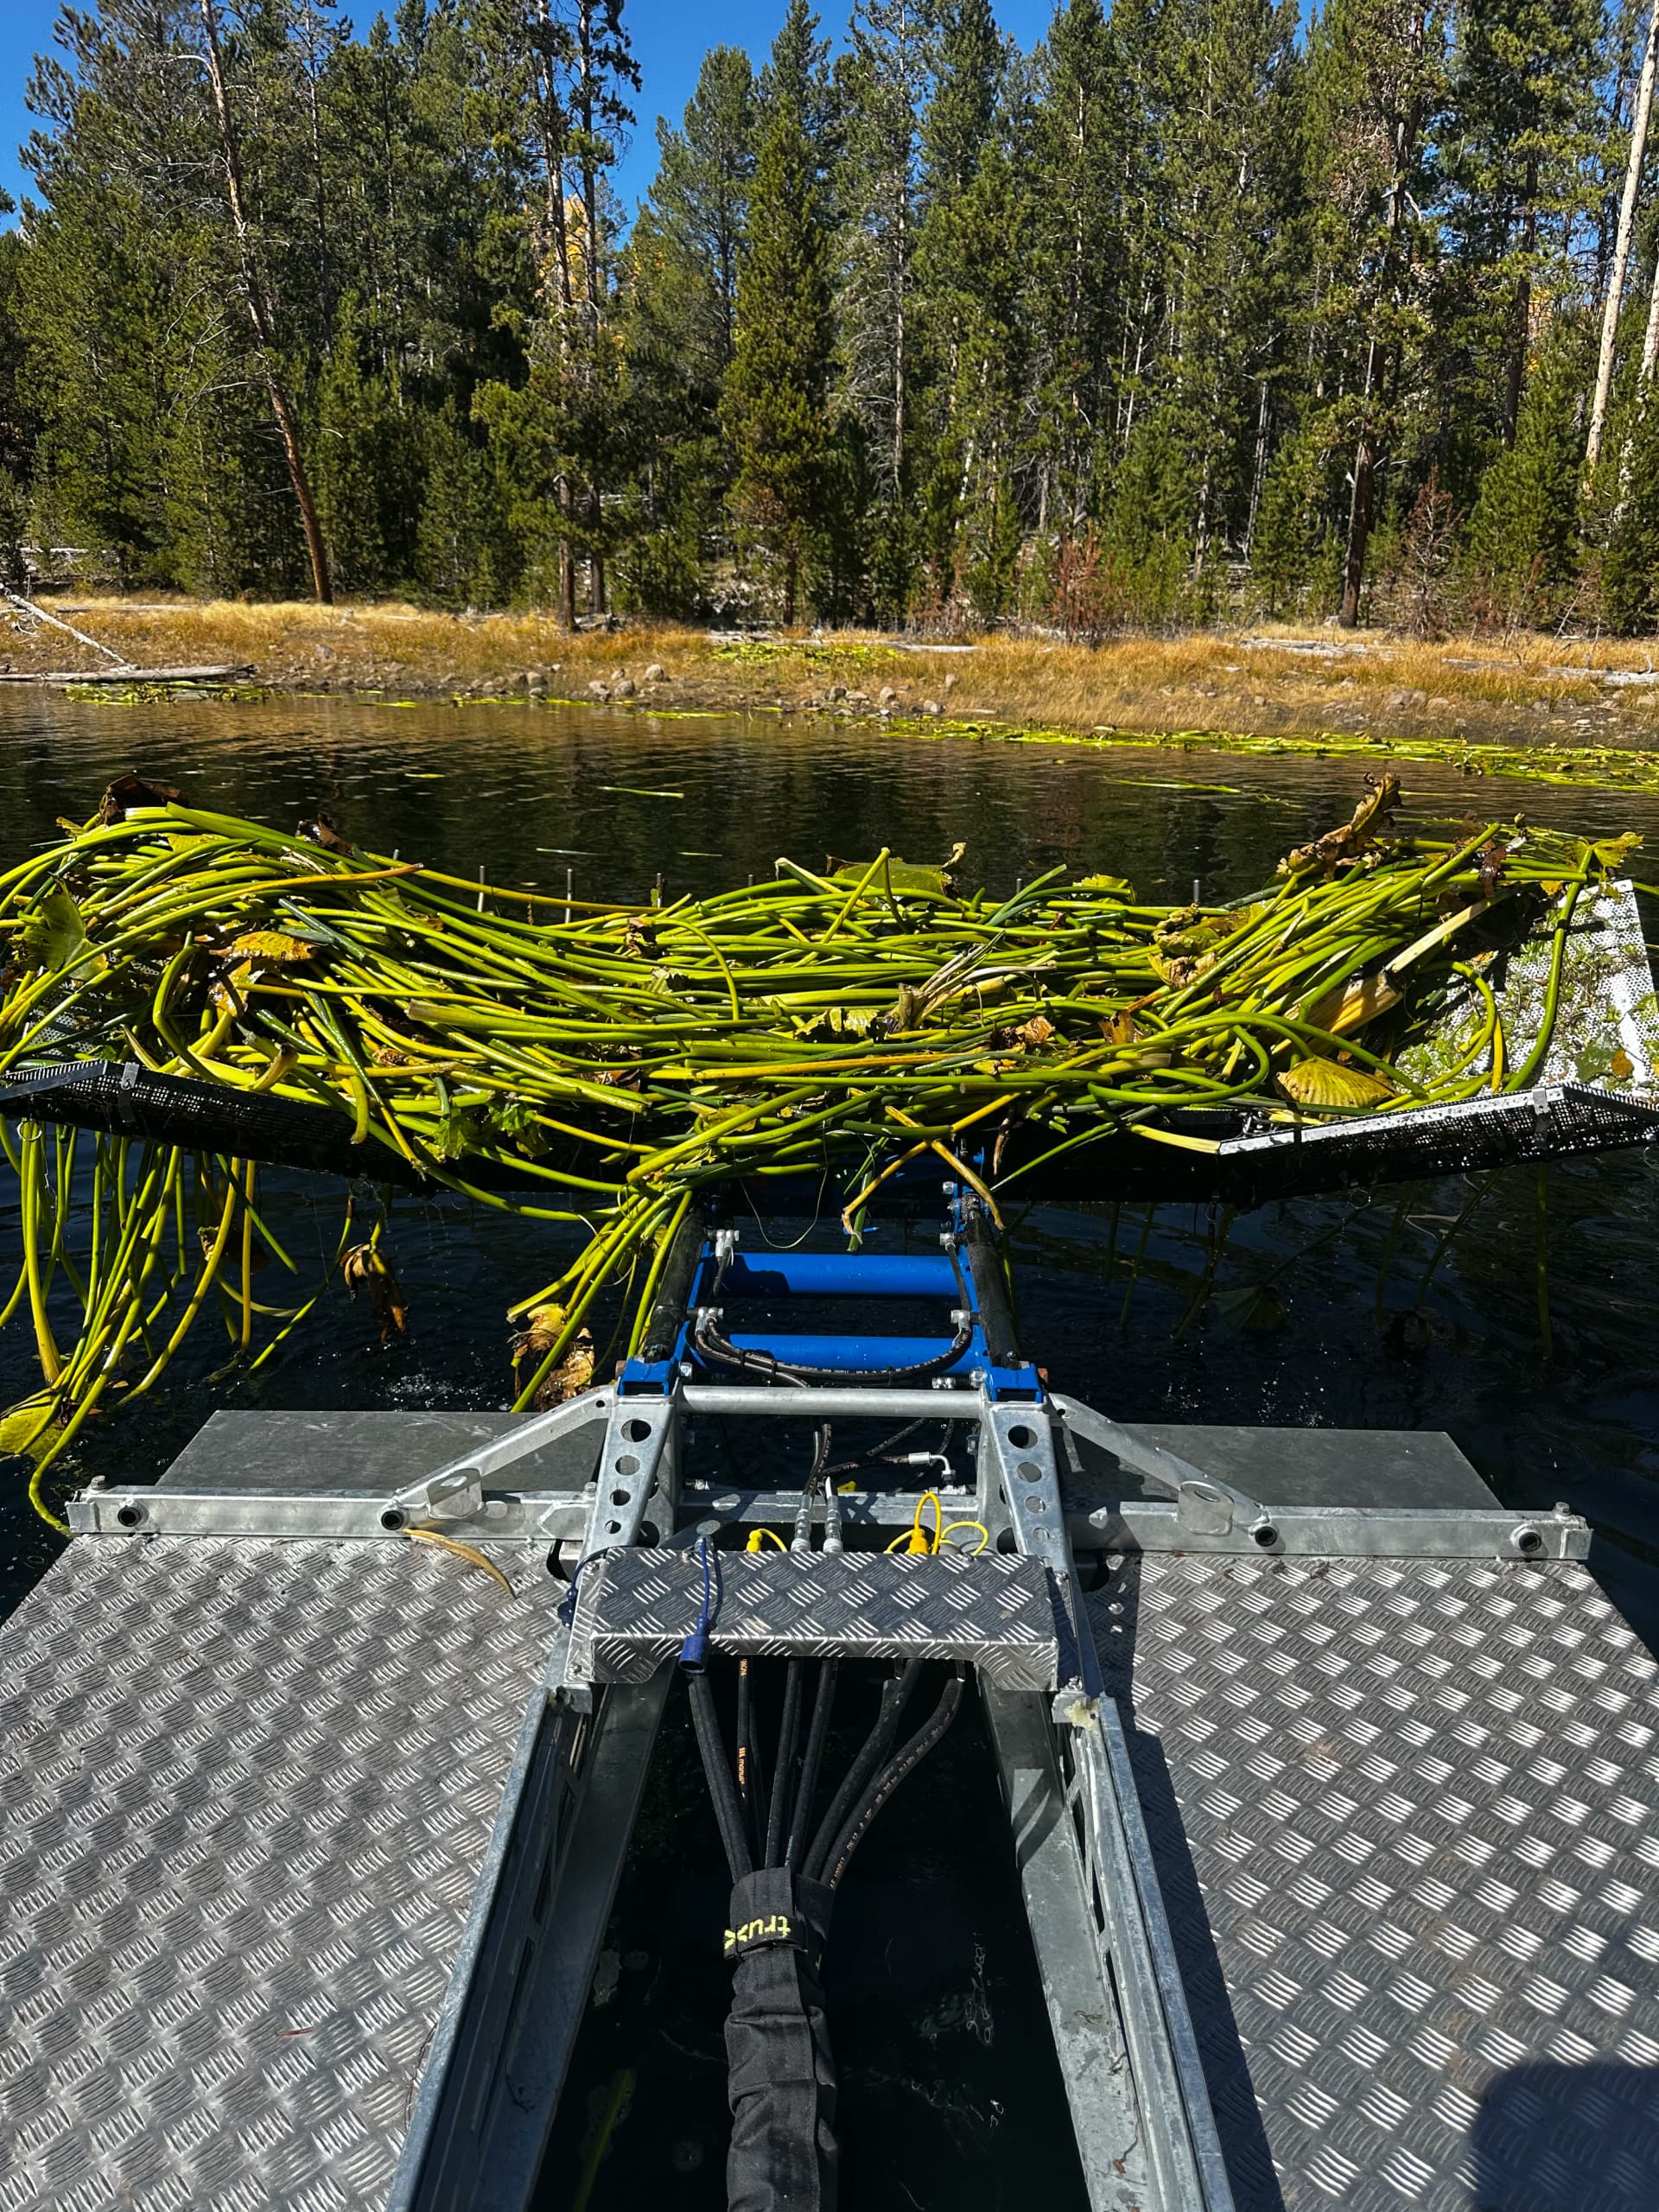
Step 3: cut in a way that stays clean (and doesn’t leave floating rafts)
The worst cattail jobs turn into floating mats. When cut material breaks loose and drifts, you get a second cleanup problem — and when it decomposes, it becomes nutrient load.
The field sequence that keeps drift under control
- Open a lane for movement and visibility (a “clean corridor”).
- Work in panels so each zone has a defined collection path.
- Convey to shore as you go to prevent drift and rework.
- Finish edges last (so the collection path stays open during production).
If the stand is mixed (cattails + debris + algae), we often pair the visit with a quick baseline plan from water quality testing so follow-up decisions aren’t guesswork.
Step 4: biomass handling (where projects quietly go sideways)
Cattails are bulky. Even when they drain, piles take space and block access. Treat biomass like inventory.
Decide your biomass path early
| Option | Good when | Watch-outs |
|---|---|---|
| Haul off-site | You want the cleanest shoreline footprint | Needs truck access and clear load zone |
| Composting partner | You have a nearby outlet and consistent volumes | Confirm acceptance rules (debris tolerance, wetness) |
| Managed on-site stockpile | Space is available and aesthetics allow | Must be placed to avoid runoff/backflow into the water |
Two simple rules keep piles from becoming the job:
- Separate wet receiving from truck loading. Don’t force trucks into the wet zone.
- Keep a clear feed edge. The machine needs room to keep production steady.
Step 5: what “good” looks like after the reset
After the first heavy cut, you should see:
- visible shoreline edge and access lanes,
- reduced “wall effect” in coves,
- fewer debris pins near the cut zone,
- a shoreline that can be maintained with lighter passes.
If cattails return aggressively in the same places, that’s usually a shelf + sediment story. That’s when we scope depth drivers and sediment hotspots using the planning framework in sediment removal plans.
Follow-up that sticks (the part most people skip)
The first big cut is the reset. The follow-up is what keeps the shoreline open.
- Schedule a lighter pass before seed heads mature (site-dependent).
- Watch for shallow shelves that drive rapid regrowth (the weed factory).
- Keep inlet corners and coves clear so debris doesn’t rebuild nutrients.
- Pair the shoreline plan with a seasonal cadence from lake management.
Field checklist (use this before you schedule)
- Identify 2–3 access points and the best firm staging zone.
- Decide where biomass goes (haul, partner, stockpile) and confirm acceptance rules.
- Mark no-go areas (utilities, intakes, docks, fragile banks).
- Define the lanes to open (recreation, maintenance, visibility, shoreline work prep).
- If algae is present, note type and baseline with water quality testing.
Service overview: harvesting.